Over at Very Good Taste I found this list and I thought it looked like fun, so I guess I'm going to try it for myself.
It's a list of 100 food items that this blogger feels should be eaten by everyone.
Apparently I am not very adventurous- I've only had 29 of these! And there are alot that I will not try.
If you'd like to play along:
1) Copy this list into your blog or journal, including these instructions.
2) Bold or Italicize all the items you’ve eaten.
3) Cross out any items that you would never consider eating. ( I put mine in red)
4) Optional extra: Post a comment at www.verygoodtaste.co.uk linking to your results.
Without further ado...The VGT Omnivore’s Hundred:
1. Venison
2. Nettle tea
3. Huevos rancheros
4. Steak tartare
5. Crocodile
6. Black pudding
7. Cheese fondue
8. Carp
9. Borscht
10. Baba ghanoush
11. Calamari
12. Pho
13. PB&J sandwich
14. Aloo gobi
15. Hot dog from a street cart
16. Epoisses
17. Black truffle
18. Fruit wine made from something other than grapes
19. Steamed pork buns
20. Pistachio ice cream
21. Heirloom tomatoes
22. Fresh wild berries
23. Foie gras
24. Rice and beans
25. Brawn, or head cheese
26. Raw Scotch Bonnet pepper
27. Dulce de leche
28. Oysters
29. Baklava
30. Bagna cauda
31. Wasabi peas
32. Clam chowder in a sourdough bowl
33. Salted lassi
34. Sauerkraut
35. Root beer float
36. Cognac with a fat cigar
37. Clotted cream tea
38. Vodka jelly/Jell-O
39. Gumbo
40. Oxtail
41. Curried goat
42. Whole insects
43. Phaal
44. Goat’s milk
45. Malt whisky from a bottle worth £60/$120 or more
46. Fugu
47. Chicken tikka masala
48. Eel
49. Krispy Kreme original glazed doughnut
50. Sea urchin
51. Prickly pear
52. Umeboshi
53. Abalone
54. Paneer
55. McDonald’s Big Mac Meal
56. Spaetzle
57. Dirty gin martini
58. Beer above 8% ABV
59. Poutine
60. Carob chips
61. S’mores
62. Sweetbreads
63. Kaolin
64. Currywurst
65. Durian
66. Frogs’ legs
67. Beignets, churros, elephant ears or funnel cake
68. Haggis
69. Fried plantain
70. Chitterlings, or andouillette
71. Gazpacho
72. Caviar and blini
73. Louche absinthe
74. Gjetost, or brunost
75. Roadkill
76. Baijiu
77. Hostess Fruit Pie
78. Snail
79. Lapsang souchong
80. Bellini
81. Tom yum
82. Eggs Benedict
83. Pocky
84. Tasting menu at a three-Michelin-star restaurant.
85. Kobe beef
86. Hare
87. Goulash
88. Flowers
89. Horse
90. Criollo chocolate
91. Spam
92. Soft shell crab
93. Rose harissa
94. Catfish
95. Mole poblano
96. Bagel and lox
97. Lobster Thermidor
98. Polenta
99. Jamaican Blue Mountain coffee
100. Snake
Friday, August 29, 2008


Tuesday, July 22, 2008
TWD: Cherry Apple Cobbler
This week I made my first ever cobbler! Yeah!! Amanda at Like Sprinkles on a Cupcake chose this weeks Tuesdays with Dorie assignment of Cherry Rhubarb Cobbler. I couldn't find rhubarb at any of my regular grocery stores so I chose to go with granny smith apples instead.
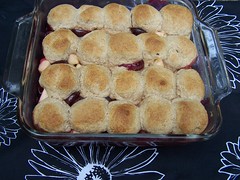
My husband's aunt was in town and it was her birthday so I gave her the cobbler. She called to let me know that she was on her third serving. So I guess it came out pretty good!
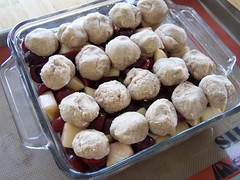
I used fresh cherries and pitted them myself. I used a pearing knife and it went pretty easy. I hear there is a tool out there for pitting cherries. Let me know if it works. Maybe I need one of those?
 Click here for the recipe.
Tuesday, July 15, 2008
TWD: Chocolate Pudding

First off, I guess I should apologize for not writing much lately. It's just that it's summer and I am so busy with selling the house, trying to find a house to buy, going to the pool, birthdays, holidays and my 5 year anniversary! But I'm back now. At least for a couple of weeks until I go to the beach (Woohoo!).
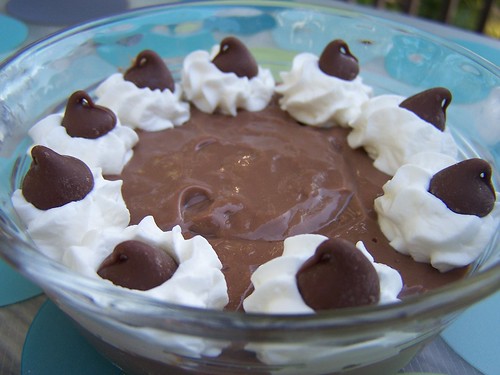
Melissa from It's Melissa's Kitchen chose this week's Tuesdays with Dorie installment and it comes in the form of chocolate pudding. I must say it was delicious! Absolutely delicious! Talk about a wonderful creaminess and oh what an intense rush of chocolate. It is soooo good. Do you understand? I'm not sure I'm getting my point across.
I used milk chocolate instead of bittersweet- what can I say? I'm a sucker for milk chocolate.

Wednesday, June 18, 2008
TWD: Peppermint Cream Puff Ring
I have to say a great big thanks to Caroline of A Consuming Passion for choosing this week's Tuesdays With Dorie recipe. And thanks to Dorie for writing it. This was fabulous! This weeks recipe was Peppermint Cream Puff Ring. Now, I knew right away I wouldn't be using the peppermint because I am not a big fan of mint. I just omitted all of the mint and used vanilla extract instead of peppermint extract.

My husbands grandparents were in town last weekend and we gobbled this up quickly. I didn't even get a chance for seconds! (Really I had some puffs hidden in my fridge so I had those later when no one was looking!)

The recipe came out perfectly. I just baked it for the whole time even though it looked like it was getting over-done. I had no eggy centers- just yummy puffs and a pretty ring of puffy wonderfulness.

Wednesday, June 11, 2008
Tops in my book...
Here are a few recipes I thought I'd share if you haven't already seen them. Hope you enjoy!


Bacon Cups from not martha

Dr. Pepper Peanut Brittle from Homesick Texan

French Toast Bagels from Confections of a Foodie Bride
Tuesday, June 10, 2008
La Palette's Strawberry Tart
It's Tuesdays with Dorie time again. This week's choice of La Palette's Strawberry Tart was chosen by Marie of A Year In Oak Cottage.
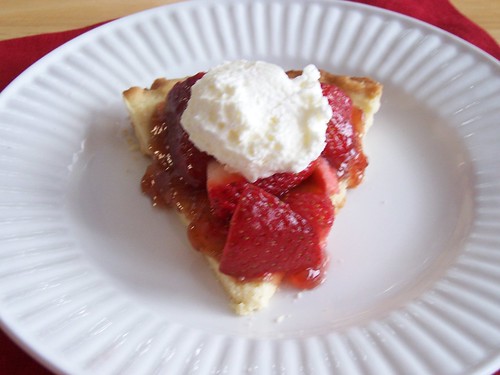
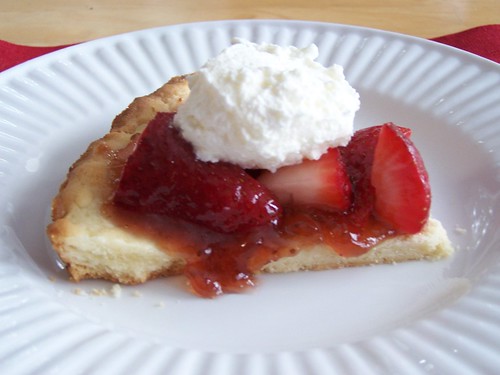
This recipe was simple and wonderful! My mother-in-law said it was like Christmas in summer in her mouth. The crust really tasted like a Christmas cookie and topped with the wonderfully summery taste of strawberry. Simply put- I loved it. I used a very tasty strawberry jam, strawberries that were not terrible but not quite the best and a tad bit of strawberry liqueur. I put all of that on the basic crust and topped it off with fresh whipped cream.
The Tuesdays With Dorie group will no longer be posting the recipes we make every Tuesday so that we don't hinder the sales of Dorie's cookbook. You can find the recipe here. Support Dorie- buy her cookbook :)- it's great!
Tuesday, June 3, 2008
Tuesdays with Dorie
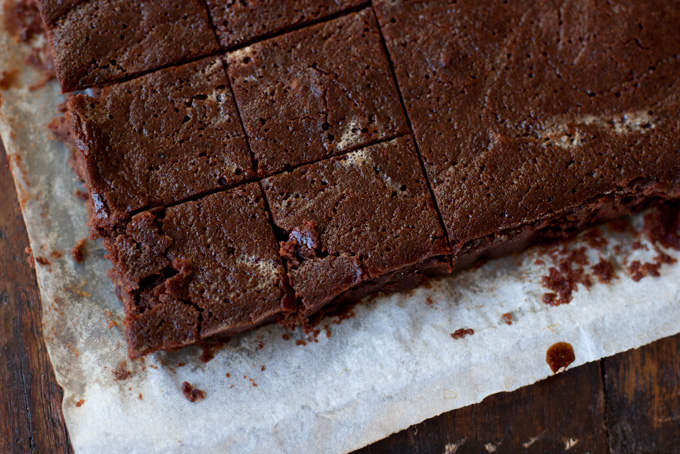
This week's assignment for Tuesdays With Dorie was chosen by Di of Di's Kitchen Notebook. She chose French Chocolate Brownies. However, my grandmother passed away Sunday morning after a long battle with Alzheimer's and I will not be able to make them. I am going to try to make some Toll House Cookies because those were her favorites. Be sure to go check out all of the wonderful bakers who did make the French Chocolate Brownies over at Tuesdays With Dorie.
French Chocolate Brownies
- makes 16 brownies -Adapted from Baking From My Home to Yours.
Ingredients
1/2 cup all-purpose flour1/8 teaspoon salt1/8 teaspoon cinnamon (optional)1/3 cup raisins, dark or golden1 1/2 tablespoons water1 1/2 tablespoons dark rum6 ounces bittersweet chocolate, finely chopped1 1/2 sticks (12 tablespoons; 6 ounces) unsalted butter, at room temperature and cut into 12 pieces3 large eggs, at room temperature1 cup sugar
Getting ready: Center a rack in the oven and preheat the oven to 300°F. Line an 8-inch square baking pan with foil, butter the foil, place the pan on a baking sheet, and set aside.
Whisk together the flour, salt and cinnamon, if you're using it.
Put the raisins in a small saucepan with the water, bring to a boil over medium heat and cook until the water almost evaporates. Add the rum, let it warm for about 30 seconds, turn off the heat, stand back and ignite the rum. Allow the flames to die down, and set the raisins aside until needed.
Put the chocolate in a heatproof bowl and set the bowl over a saucepan of simmering water. Slowly and gently melt the chocolate, stirring occasionally. Remove the bowl from the saucepan and add the butter, stirring so that it melts. It's important that the chocolate and butter not get very hot. However, if the butter is not melting, you can put the bowl back over the still-hot water for a minute. If you've got a couple of little bits of unmelted butter, leave them—it's better to have a few bits than to overheat the whole. Set the chocolate aside for the moment.
Working with a stand mixer with the whisk attachment, or with a hand mixer in a large bowl, beat the eggs and sugar until they are thick and pale, about 2 minutes. Lower the mixer speed and pour in the chocolate-butter, mixing only until it is incorporated—you'll have a thick, creamy batter. Add the dry ingredients and mix at low speed for about 30 seconds—the dry ingredients won't be completely incorporated and that's fine. Finish folding in the dry ingredients by hand with a rubber spatula, then fold in the raisins along with any liquid remaining in the pan.
Scrape the batter into the pan and bake 50 to 60 minutes, or until the top is dry and crackled and a knife inserted into the center of the cake comes out clean. Transfer the pan to a rack and allow the brownies to cool to warm or room temperature.
Carefully lift the brownies out of the pan, using the foil edges as handles, and transfer to a cutting board. With a long-bladed knife, cut the brownies into 16 squares, each roughly 2 inches on a side, taking care not to cut through the foil.
Serving: The brownies are good just warm or at room temperature; they're even fine cold. I like these with a little something on top or alongside—good go-alongs are whipped crème fraiche or whipped cream, ice cream or chocolate sauce or even all three!
Storing: Wrapped well, these can be kept at room temperature for up to 3 days or frozen for up to 2 months.
French Chocolate Brownies
- makes 16 brownies -Adapted from Baking From My Home to Yours.
Ingredients
1/2 cup all-purpose flour1/8 teaspoon salt1/8 teaspoon cinnamon (optional)1/3 cup raisins, dark or golden1 1/2 tablespoons water1 1/2 tablespoons dark rum6 ounces bittersweet chocolate, finely chopped1 1/2 sticks (12 tablespoons; 6 ounces) unsalted butter, at room temperature and cut into 12 pieces3 large eggs, at room temperature1 cup sugar
Getting ready: Center a rack in the oven and preheat the oven to 300°F. Line an 8-inch square baking pan with foil, butter the foil, place the pan on a baking sheet, and set aside.
Whisk together the flour, salt and cinnamon, if you're using it.
Put the raisins in a small saucepan with the water, bring to a boil over medium heat and cook until the water almost evaporates. Add the rum, let it warm for about 30 seconds, turn off the heat, stand back and ignite the rum. Allow the flames to die down, and set the raisins aside until needed.
Put the chocolate in a heatproof bowl and set the bowl over a saucepan of simmering water. Slowly and gently melt the chocolate, stirring occasionally. Remove the bowl from the saucepan and add the butter, stirring so that it melts. It's important that the chocolate and butter not get very hot. However, if the butter is not melting, you can put the bowl back over the still-hot water for a minute. If you've got a couple of little bits of unmelted butter, leave them—it's better to have a few bits than to overheat the whole. Set the chocolate aside for the moment.
Working with a stand mixer with the whisk attachment, or with a hand mixer in a large bowl, beat the eggs and sugar until they are thick and pale, about 2 minutes. Lower the mixer speed and pour in the chocolate-butter, mixing only until it is incorporated—you'll have a thick, creamy batter. Add the dry ingredients and mix at low speed for about 30 seconds—the dry ingredients won't be completely incorporated and that's fine. Finish folding in the dry ingredients by hand with a rubber spatula, then fold in the raisins along with any liquid remaining in the pan.
Scrape the batter into the pan and bake 50 to 60 minutes, or until the top is dry and crackled and a knife inserted into the center of the cake comes out clean. Transfer the pan to a rack and allow the brownies to cool to warm or room temperature.
Carefully lift the brownies out of the pan, using the foil edges as handles, and transfer to a cutting board. With a long-bladed knife, cut the brownies into 16 squares, each roughly 2 inches on a side, taking care not to cut through the foil.
Serving: The brownies are good just warm or at room temperature; they're even fine cold. I like these with a little something on top or alongside—good go-alongs are whipped crème fraiche or whipped cream, ice cream or chocolate sauce or even all three!
Storing: Wrapped well, these can be kept at room temperature for up to 3 days or frozen for up to 2 months.
Tuesday, May 27, 2008
Pecan Honey Sticky Buns
I must say that this week's recipe for Tuesdays with Dorie was my favorite so far. I love sticky buns!!! I repeat, I LOVE STICKY BUNS!!!

So, this week Madame Chow of Madame Chow's Kitchen chose the Pecan Honey Sticky Buns. They are fabulous. I made the first batch Sunday night for my husband's family and forgot to take pictures before we scarfed them down. So tonight I made another small batch to have some to take pictures of . (Oh darn!) I let them cook a few minutes too long so they got a little browner than I would have liked. They were still good though!

Pecan Honey Sticky Buns
Makes 15 buns
For the Glaze:
1 cup (packed) light brown sugar
1 stick (8 tablespoons) unsalted butter, cut into 4 pieces
1/4 cup honey1-1/2 cups pecans (whole or pieces)
1 stick (8 tablespoons) unsalted butter, cut into 4 pieces
1/4 cup honey1-1/2 cups pecans (whole or pieces)
For the Filling:
1/4 cup sugar
3 tablespoons (packed) light brown sugar
3 tablespoons (packed) light brown sugar
1 tablespoon ground cinnamon
3 tablespoons unsalted butter, at room temperature
3 tablespoons unsalted butter, at room temperature
For the Buns:
1/2 recipe dough for Golden Brioche loaves (see below), chilled and ready to shape (make the full recipe and cut the dough in half after refrigerating it overnight)
Generously butter a 9-x-13-inch baking pan (a Pyrex pan is perfect for this).
To make the glaze: In a heavy-bottomed saucepan, bring the brown sugar, butter, and honey to a boil over medium-low heat, stirring frequently to
dissolve the sugar. Pour the glaze into the buttered pan, evening it out as best you can by tilting the pan or spreading the glaze with a heatproof spatula. Sprinkle over the pecans.
To make the filling: Mix the sugars and cinnamon together in a bowl. If necessary, in another bowl, work the butter with a spatula until it is soft, smooth and spreadable.
To shape the buns: On a flour-dusted work surface, roll the chilled dough into a 16-inch square. Using your fingers or a pastry brush, spread the softened butter over the dough. Sprinkle the do
ugh with the cinnamon sugar, leaving a 1-inch strip bare on the side farthest from you. Starting with the side nearest you, roll the dough into a cylinder, keeping the roll as tight as you can. (At this point, you can wrap the dough airtight and freeze it for up to 2 months . . . . Or, if you want to make just part of the recipe now, you can use as much of the dough as you'd like and freeze the remainder. Reduce the glaze recipe accordingly).
With a chef's knife, using a gentle sawing motion, trim just a tiny bit from the ends of the roll if they're very ragged or not well filled, then cut the log into 1-inch thick buns. (Because you trim the ragged ends of the dough, and you may have lost a little length in the rolling, you will get 15 buns, not 16.) Fit the buns into the pan cut side down, leaving some space between them.
Lightly cover the pan with a piece of wax paper and set the pan in a warm place until the buns have doubled in volume, about 1 hour and 45 minutes. The buns are properly risen when they are puffy, soft, doubled and, in all likelihood, touching one another.
Getting ready to bake: When the buns have almost fully risen , center a rack in the oven and preheat the oven to 375 degrees F.
Remove the sheet of wax paper and put the pan on a baking sheet lined with parchment or a silicone mat. Bake the sticky buns for about 30 minutes, or until they are puffed and gorgeously golden; the glaze will be bubbling away merrily. Pull the pan from the oven.
The sticky buns must be unmolded minutes after they come out of the oven. If you do not have a rimmed platter large enough to hold them, use a baking sheet lined with a silicone mate or buttered foil. Be careful - the glaze is super-hot and super-sticky.
What You'll Need for the Golden Brioche Dough (this recipe makes enough for two brioche loaves. If you divide the dough in half, you would use half for the sticky buns, and you can freeze the other half for a later date, or make a brioche loaf out of it!):
2 packets active dry yeast (each packet of yeast contains approx. 2 1/4 teaspoons)
1/3 cup just-warm-to-the-touch water
1/3 cup just-warm-to-the-touch whole milk3 1/3 cups all-purpose flour
2 teaspoons salt
3 large eggs, at room temperature1/4 cup sugar
3 sticks (12 ounces) unsalted butter, at room temperature but still slightly firm
1/3 cup just-warm-to-the-touch water
1/3 cup just-warm-to-the-touch whole milk3 1/3 cups all-purpose flour
2 teaspoons salt
3 large eggs, at room temperature1/4 cup sugar
3 sticks (12 ounces) unsalted butter, at room temperature but still slightly firm
What You'll Need for the Glaze (you would brush this on brioche loaves, but not on the sticky buns):
1 large egg1 tablespoon water

To Make The Brioche: Put the yeast, water and milk in the bowl of a stand mixer and, using a wooden spoon, stir until the yeast is dissolved. Add the flour and salt, and fit into the mixer with the dough hook, if you have one. Toss a kitchen towel over the mixer, covering the bowl as completely as you can-- this will help keep you, the counter and your kitchen floor from being showered in flour. Turn the mixer on and off a few short pulses, just to dampen the flour (yes, you can peek to see how you're doing), then remove the towel, increase the mixer speed to medium-low and mix for a minute or two, just until the flour is moistened. At this point, you'll have a fairly dry, shaggy mess.
Scrape the sides and bottom of the bowl with a rubber spatula, set the mixer to low and add the eggs, followed by the sugar. Increase the mixer speed to medium and beat for about 3 minutes, until the dough forms a ball. Reduce the speed to low and add the butter in 2-tablespoon-size chunks, beating until each piece is almost incorporated before adding the next. You'll have a dough that is very soft, almost like batter. Increase the speed to medium-high and continue to beat until the dough pulls away from the sides of the bowl, about 10 minutes.
Transfer the dough to a clean bowl (or wash out the mixer bowl and use it), cover with plastic wrap and leave at room temperature until nearly doubled in size, 40 to 60 minutes, depending upon the warmth of your room.
Deflate the dough by lifting it up around the edges and letting it fall with a slap to the bowl. Cover the bowl with the plastic wrap and put it in the refrigerator. Slap the dough down in the bowl every 30 minutes until it stops rising, about 2 hours, then leave the uncovered dough in the refrigerator to chill overnight. (After this, you can proceed with the recipe to make the brioche loaves, or make the sticky buns instead, or freeze all or part of the dough for later use.)
The next day, butter and flour two 8 1/2-x-4 1/2-inch pans.Pull the dough from the fridge and divide it into 2 equal pieces. Cut each piece of the dough into 4 equal pieces and roll each piece into a log about 3 1/2 inches long. Arran
ge 4 logs crosswise in the bottom of each pan. Put the pans on a baking sheet lined with parchment or a silicone mat,
cover the pans lightly with wax paper and leave the loaves at room temperature until the dough almost fills the pans, 1 to 2 hours. (Again, rising time with depend on how warm the room is.)
Getting Ready To Bake: Center a rack in the oven and preheat the oven to 400 degrees F.
To Make the Glaze: Beat the egg with the water. Using a pastry brush, gently brush the tops of the loaves with the glaze.
Bake the loaves until they are well risen and deeply golden, 30 to 35 minutes. Transfer the pans to racks to cool for 15 minutes, then run a knife around the sides of the pans and turn the loaves out onto the racks. Invert again and cool for at least 1 hour.
Tuesday, May 20, 2008
A New Installment...
There are so many wonderful recipes that I find in the many blogs I try to keep up with. I thought a fun thing to do to help me keep track of them and also to share them with the very few people who actually read my blog would be to post a few every week or so.
So here is my first attempt at sharing with you what looks good to me:


Chipotle Black Bean & Rice Stew at 28 Cooks

Rosemary Balsamic Chicken Salad at Cafe Johnsonia

TWD: Madeleines
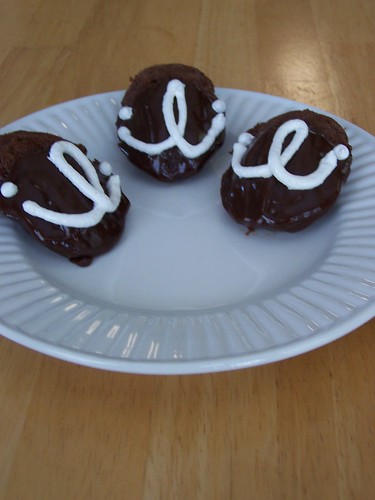
So, apparently I did not follow directions very well for this weeks Tuesdays with Dorie task. Tara of Smells Like Home chose Traditional Madeleines. I'm not sure why when I read I assumed we could choose from all the Madeleines but I did. So I suppose that when we get around to making the Fluff-Filled Chocolate Madeleines I will make traditional Madeleines. My apologies- so sorry!
I had a bit of a hard time finding my madeleine pan. I know I've made madeleines before. I remember that shortly after I got married I found a madeleine pan at World Market and just had to have it. Sometime in the last five years it has disappeared. I have moved since then and our stuff was in storage for a while. Somehow I always end up missing a couple things after moving. But it has taken me three years to realize that it was missing. So, I trekked down to Bed, Bath and Beyond and picked up a new one. Hopefully, I can keep track of this one!
My husband said the Fluff-filled Madeleines were tasty. I don't care to much for cake- especially chocolate cake. They were very similar to a Hostess cupcake as Dorie said they would be. My husband came home from work and ate three before dinner!

Fluff-Filled Chocolate Madeleines
Adapted from Baking: From My Home to Yours- makes 12 cookies -
Adapted from Baking: From My Home to Yours- makes 12 cookies -
Ingredients:
For the madeleines:
2/3 cup all-purpose flour
1/4 cup unsweetened cocoa powder
1/2 teaspoon baking powder
Pinch of salt
2 large eggs, at room temperature
1/2 cup sugar
1/2 teaspoon pure vanilla extract
3/4 stick (6 tablespoons) unsalted butter, melted and cooled
Fluff, for filling and frosting (I used this recipe for fluff)
For the dip:
4 ounces bittersweet chocolate, finely chopped
1/2 cup heavy cream
1 1/2 tablespoons unsalted butter, at room temperature
Procedure:
To make the madeleines: Sift the flour, cocoa, baking powder and salt together.
To make the madeleines: Sift the flour, cocoa, baking powder and salt together.
Working with a stand mixer fitted with the whisk attachment or with a hand mixer in a large bowl, beat the eggs and sugar together until they are pale and slightly thickened, about 3 minutes. Beat in the vanilla extract, switch to a large rubber spatula and gently fold in the sifted dry ingredients, followed by the melted butter. Put a piece of plastic wrap directly against the surface of the batter and refrigerate it for at least 3 hours or for up to 2 days. Chilling the batter gives you a better chance of getting the characteristic bump on the back of the cookies.
Getting ready to bake: Center a rack in the oven and preheat the oven to 400 degrees F. Generously butter 12 full-size madeleine molds, dust the insides with flour and tap out the excess. Butter and flour the pan even if it is nonstick; you can skip this step if you are using silicone pans. Place the pan on a baking sheet.
Spoon the batter into the molds.
Place the pan in the oven and immediately lower the oven temperature to 350 degrees F. Bake the cookies for 13 to 15 minutes, or until they feel springy to the touch. Remove the pan from the oven and rap one side of the madeleine pan against the counter – the plump little cakes should come tumbling out. Gently pry any reluctant cookies out with your fingers or a butter knife. Cool to room temperature on a rack.
To fill the madeleines: Fit a small pastry bag with a small plain tip and spoon Fluff into the bag. Use the point of the tip to poke a hole in the rounded (plain) side of each madeleine, and pipe enough Fluff into each cookie to fill it—stop when the Fluff reaches the top of the cake. (You'll use only a bit of Fluff.)
Spoon the batter into the molds.
Place the pan in the oven and immediately lower the oven temperature to 350 degrees F. Bake the cookies for 13 to 15 minutes, or until they feel springy to the touch. Remove the pan from the oven and rap one side of the madeleine pan against the counter – the plump little cakes should come tumbling out. Gently pry any reluctant cookies out with your fingers or a butter knife. Cool to room temperature on a rack.
To fill the madeleines: Fit a small pastry bag with a small plain tip and spoon Fluff into the bag. Use the point of the tip to poke a hole in the rounded (plain) side of each madeleine, and pipe enough Fluff into each cookie to fill it—stop when the Fluff reaches the top of the cake. (You'll use only a bit of Fluff.)
To make the dip: Put the chocolate in a small deep heatproof bowl. Bring the heavy cream to a full boil, then pour it over the chocolate. Wait 1 minute, then gently whisk the cream into the chocolate. Start at the center and slowly work your way out in concentric circles until you have a smooth, shiny mixture. Gently whisk in the butter.
Line a small baking sheet with wax paper. One by one, hold a madeleine at its narrow end and dip it into the chocolate, then lift it up, let the excess chocolate drip back into the bowl and place the cookie, plain side down, on the wax paper. Slide the baking sheet into the refrigerator to set the glaze, about 15 minutes. (You'll have more ganache than you need, but making a larger quantity produces a better ganache. Leftover dip can be covered and refrigerated for 1 week or frozen for up to 2 months.)
If you'd like, pipe a little squiggle of Fluff on the top of each Madeleine once the chocolate is set.
Serving: Coffee of every variety, milk and hot chocolate are all good companions.
Storing: Although the batter can be kept in the refrigerator for a couple of days, the madeleines should be eaten soon after they are made. However, wrapped airtight, they can be frozen—even after they've been filled and frosted—for up to 2 months. And stale madeleines, as Proust would be the first to tell you, are good for dunking.
Storing: Although the batter can be kept in the refrigerator for a couple of days, the madeleines should be eaten soon after they are made. However, wrapped airtight, they can be frozen—even after they've been filled and frosted—for up to 2 months. And stale madeleines, as Proust would be the first to tell you, are good for dunking.
Monday, May 12, 2008
Peanut Butter Torte

Well, I did last weeks Tuesdays With Dorie recipe on time. Elizabeth of Ugg Smell Food chose the Peanut Butter Torte. But I was sick last week and I just didn't feel like typing this up. So here it is almost a week late. I made four mini tortes. They were extremely rich and after one bite I didn't really want another. Now my husband on the other hand ate an entire mini torte in one sitting.

Peanut Butter Torte
1 ¼ c. finely chopped salted peanuts (for the filling, crunch and topping)
2 teaspoons sugar
½ teaspoon instant espresso powder (or finely ground instant coffee)
¼ teaspoon ground cinnamon
Pinch of freshly grated nutmeg
½ c. mini chocolate chips (or finely chopped semi sweet chocolate)
24 Oreo cookies, finely crumbed or ground in a food processor or blender
½ stick (4 tablespoons) unsalted butter, melted and co
oled
Small pinch of salt
2 ½ c. heavy cream
1 ¼ c confectioners’ sugar, sifted
12 ounces cream cheese, at room temperature
1 ½ c salted peanut butter – crunchy or smooth (not natural; I use Skippy)
2 tablespoons whole milk
4 ounces bittersweet chocolate finely chopped
Getting ready: center a rack in the oven and preheat th
e oven to 350°F. Butter a 9-inch Springform pan and place it on a baking sheet lined with parchment or a silicone mat.
Toss ½ cup of the chopped peanuts, the sugar, espresso powder, cinnamon, nutmeg and chocolate chops together in a small bowl. Set aside.
Put the Oreo crumbs, melted butter and salt in another
small bowl and stir with a fork just until crumbs are moistened. Press the crumbs evenly over the bottom and up the sides of the spring form pan (they should go up about 2 inches on the sides). Freeze the crust for 10 minutes.
Bake the crust for 10 minutes, then transfer it to a rack and let it cool completely before filling.
Working with a stand mixer fitted with the whisk attachment or with a hand mixer in a large bowl, whip 2 cups of the cream until it holds medium peaks. Beat in ¼ cup of the confectioners’ sugar and whip until the cream holds medium-firm peaks. Crape the cream into a bowl and refrigerate until needed.
Wipe out (do not wash) the bowl, fit the stand mixer with the paddle attachment if you have one, or continue with the hand mixer, and beat the cream cheese with the remaining 1 cup confectioners’ sugar
on medium speed until the cream cheese is satiny smooth. Beat in the peanut butter, ¼ cup of the chopped peanuts and the milk.
Using a large rubber spatula, gently stir in about one quarter of the whipped cream, just to lighten the mousse. Still working with the spatula, stir in the crunchy peanut mixture, then gingerly fold in the remaining whipped cream.
Scrape the mouse into the crust, mounding and smoothing the top. Refrigerate for at least 4 hours, or overnight; cover with plastic wrap as soon as the mousse firms.
To Finish The Torte: put the chopped chocolate in a heatproof bowl and
set the bowl over a saucepan of simmering water. Leave the bowl over the water just until the chocolate softens and starts to melt, about 3 minutes; remove the bowl from the saucepan.
Bring the remaining ½ cup cream to a full boil. Pour the cream over the chocolate and , working with a a rubber spatula, very gently stir together until the ganache is completely blended and glossy.
Pour the ganache over the torte, smoothing it with a metal icing spatula. Scatter the remaining ½ cup peanuts over the top and chill to set the topping, about 20 minutes.
When the ganache is firm, remove the sides of the Springform pan; it’s easiest to warm the pan with a hairdryer, and then remove the sides, but you can also wrap a kitchen towel damped with hot water around the pan and leave it there for 10 seconds. Refrigerate until ready to serve.

An Attempt at Gardening
Peppers
So last year I decided I would attempt a (very small) garden. I had six tomato plants, jalapenos and bell peppers. The bell peppers did not do well at all. The tomatoes grew fabulously and put out a lot of tomatoes. However, the dang deer loved my tomatoes! They would get them just before I was ready to pick them. But I'm glad that the deer liked them. That has to serve as some sort of compliment to the gardener, right? The jalapenos were perfect. The deer did not like them and I did- a perfect combination!
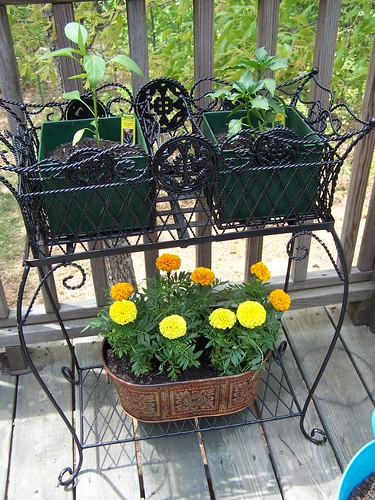
This year my garden is even smaller and its on my back deck. This is to try and keep the deer out of my plants. So, I have one tomato plant, one jalapeno and one poblano. In addition I've decided to try and grow some herbs. I planted basil, chives, rosemary, thyme, oregano and cilantro. I planted twice as many as I needed and gave my mother-in-law an herb garden for mother's day. I also planted a Roma tomato and a grape tomato for my mom and a banana pepper for her as well. (She doesn't have a garden of her own any more).
So without further ado- here is my tiny little back deck garden that I love and hope does well:
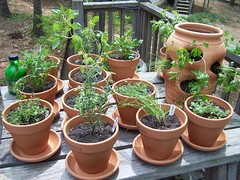
My Herbs
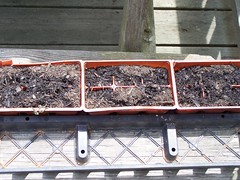
Cilantro
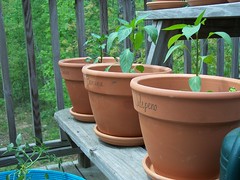
Peppers

Tomatoes
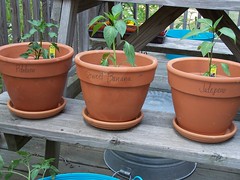
Peppers
Monday, April 28, 2008
Fluted Polenta and Ricotta Cake
This week in our Tuesdays With Dorie's quest, Caitlin of Engineer Baker chose:

Well, I have to say that my second Tuesdays With Dorie assignment did not go as well as the first. The cake looked great. I had no overflow of the batter. I didn't have the "sunken rectangles" from the butter. I had the little white circles from the pats of butter. ( I cut the butter up very tiny to try and prevent the sunkenness ( is that even a word- it has a red line under so I'm gonna assume it's not!). It was a very pretty color. And then it was time to remove the pan. I don't know what I thought would happen. I mean five minutes earlier the pan had just come out of a really hot oven. So why would I think that I could let the outer ring of the tart pan slide down around my arm while I set the cake back on the cooling rack?? Well, when you do this I will tell you that it burns- bad. I could try and explain to you what happened at this point but I'll just show you. At least it didn't fall on the floor!


Fluted Polenta and Ricotta Cake
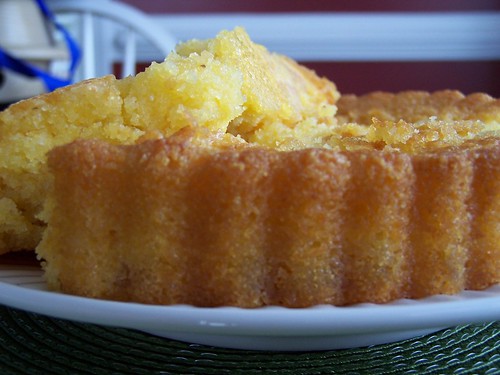
Well, I have to say that my second Tuesdays With Dorie assignment did not go as well as the first. The cake looked great. I had no overflow of the batter. I didn't have the "sunken rectangles" from the butter. I had the little white circles from the pats of butter. ( I cut the butter up very tiny to try and prevent the sunkenness ( is that even a word- it has a red line under so I'm gonna assume it's not!). It was a very pretty color. And then it was time to remove the pan. I don't know what I thought would happen. I mean five minutes earlier the pan had just come out of a really hot oven. So why would I think that I could let the outer ring of the tart pan slide down around my arm while I set the cake back on the cooling rack?? Well, when you do this I will tell you that it burns- bad. I could try and explain to you what happened at this point but I'll just show you. At least it didn't fall on the floor!
I didn't have the time to make another. And in all honesty- I had no more butter even if I would have had the time to make another cake. But the cake tasted very good. It is surprisingly sweet. I could not find figs at our market so I used dried apricots instead- it worked out rather nicely I think!
I tried to make it look better here:
I am just going to call it "rustic". Maybe it just looks like I don't own any knives and I had to tear it into slices? Do you think people would believe it?
Fluted Polenta and Ricotta Cake
About 16 moist, plump dried Mission or Kadota figs, stemmed
1 c. medium-grain polenta or yellow cornmeal
½ c. all-purpose flour
1 tsp baking powder
1 c. ricotta
1/3 c. tepid water
¾ c. sugar
¾ c. honey (if you’re a real honey lover, use a full-flavored honey such as chestnut, pine, or buckwheat)
Grated zest of 1 lemon
2 large eggs
Getting Ready: Center a rack in the oven and preheat the oven to 325 degrees F. Butter a 10 ½-inch fluted tart pan with a removable bottom and put it on a baking sheet lined with parchment or a silicone mat.
Check that the figs are, indeed, moist and plump. If they are the least bit hard, toss them into a small pan of boiling water and steep for a minute, then drain and pat dry. If the figs are large (bigger than a bite), snip them in half.
Whisk the polenta, flour, baking powder, and salt together.
Working with a stand mixer fitted with the whisk attachment or with a hand mixer in a large bowl, beat the ricotta and water together on low speed until very smooth. With the mixer at medium speed, add the sugar, honey, and lemon zest and beat until light. Beat in the melted butter, then add the eggs one at a time, beating until the mixture is smooth. Reduce the mixer speed to low and add the dry ingredients, mixing only until they are fully incorporated. You’ll have a sleek, smooth, pourable batter.
Pour about one third of the batter into the pan and scatter over the figs. Pour in the rest of the batter, smooth the top with a rubber spatula, if necessary, and dot the batter evenly with the chilled bits of butter.
Bake for 35 to 40 minutes, or until a thin knife inserted into the center of the cake comes out clean. The cake should be honey brown and pulling away just a little from the sides of the pan, and the butter will have left light-colored circles in the top. Transfer the cake to a rack and remove the sides of the pan after about 5 minutes. Cool to warm, or cool completely.
Tuesday, April 22, 2008
Slowly Going Green
I will be the first to admit that I should be doing more to save the planet for our grandkids and their grandkids and their grandkids (you get the point). So in honor of Earth Day I am going to do ter from here on. I will take baby steps but every little bit counts, right?
Here are some "green" products I like: RECYCLE- This composter is way cooler than the plain old pile of compost in my backyard! You can buy this here.


Here are some "green" products I like:
RECYCLE- This composter is way cooler than the plain old pile of compost in my backyard! You can buy this here. REDUCE- High Efficiency Appliances- who doesn't like saving money on water and electricity? I have the Cabrio set from Whirpool and really love them.
Tuesdays With Dorie

For a few months now I have been watching this wonderful group of bakers over at Tuesdays With Dorie as they bake their way through Dorie Greenspan's book, Baking: From My Home to Yours. I knew I wanted to join them. In order for that to happen I had to make a few other things happen first:
1- I needed a blog. Check!
2- I needed to make a commitment. Check!
3- I had to get a copy of the book. Check!!!!
Now that all three have been checked off- I am now a member of this wonderful group, Tuesdays with Dorie!
This is my first week and Amanda over at Slow Like Honey gave us our "assignment" of Bill's Big Carrot Cake. I am not a huge fan of carrot cake, however, I did find some carrot cake lovers to share the cake with. They said they really enjoyed it. In an attempt to get my husband to eat some of the cake I substituted chocolate chips for the raisins. It still didn't work- His exact words were "gross". He really is a dessert lover but he does not like carrot cake- oh well!

Bill's Big Carrot Cakes
Baking: From My Home to Yours by Dorie Greenspan
Yields 10 servings
Ingredients:
For the cake:
2 cups all purpose flour
2 teaspoons baking powder
2 teaspoons baking soda
2 teaspoons ground cinnamon
¾ teaspoon salt
3 cups grated carrots (about 9 carrots, you can grate them in food processor fitted w/ a shredding a blade or use a box grater)
1 cup coarsely chopped walnuts or pecans
1 cup shredded coconut (sweetened or unsweetened)
½ cup moist, plump raisins (dark or golden) or dried cranberries
2 cups sugar
1 cup canola oil
4 large eggs
For the frosting:
8 ounces cream cheese, room temperature
1 stick ( 8 tablespoons) unsalted butter, at room temperature
1 pound or 3 and ¾ cups confectioners' sugar, sifted
1 tablespoon fresh lemon juice or ½ teaspoon pure lemon extract
½ cup shredded coconut (optional)
Finely chopped toasted nuts and/or toasted shredded coconut (optional)
Getting ready:
Position the racks to divide the oven into thirds and preheat the oven to 325 degrees Fahrenheit. Butter three 9-x-2-inch round cake pans, flour the insides, and tap out the excess. Put the two pans on one baking sheet and one on another.
To make the cake:
Whisk the flour, baking powder, baking soda, cinnamon and salt. In another bowl, stir together the carrots, chopped nuts, coconut, and raisins.
Working with a stand mixer, preferably fitted with a paddle attachment, or with a hand mixer in a large bowl, beat the sugar and oil together on a medium speed until smooth. Add the eggs one by one and continue to beat until the batter is even smoother. Reduce the speed to low and add the flour mixture, mixing only until the dry ingredients disappear. Gently mix the chunky ingredients. Divide the batter among the baking pans.
Bake for 40-50 minutes, rotating the pans from top to bottom and front to back at the midway point, until a thin knife inserted into the centers comes out clean. The cakes will have just started to come away from the sides of the pans. Transfer the cakes to cooling racks and cool for about 5 minutes, then run a knife around the sides of the cakes and unmold them. Invert and cool to room temperature right side up.
The cakes can be wrapped airtight and kept at room temperature overnight or frozen for up to 2 months.
To make the frosting:
Working with a stand mixer, preferably fitted with a paddle attachment or with a hand mixer in a large bowl, beat the cream cheese and butter together until smooth and creamy. Gradually add the sugar and continue to beat until the frosting is velvety smooth. Beat in the lemon juice or extract.
If you'd like coconut in the filling, scoop about half of the frosting and stir the coconut into this position.
To assemble the cake:
Put one layer top side up on a cardboard cake round or a cake plate protected by strips of wax or parchment paper. If you added the coconut to the frosting, use half of the coconut frosting to generously cover the first layer (or generously cover with plain frosting). Use an offset spatula or a spoon to smooth the frosting all the way to the edges of the layer. Top with the second layer, this time placing the cake stop side down, and frost with the remainder of the coconut frosting or plain frosting. Top with the last layer, right side up, and frost the top- and the sides- of the cake. Finish the top with swirls of frosting. If you want to top the cake with toasted nuts or coconut, sprinkle them on now while the frosting is soft.
Refrigerate the cake for 30 minutes, just to set the frosting before serving.
Serving:
This cake can be served as soon as the frosting is set. It can also wait, at room temperature and covered with a cake keeper overnight. The cake is best served in thick slices at room temperature and while it's good plain, it's even better with vanilla ice cream or some lemon curd.
Storing:
The cake will keep at room temperature for 2 to 3 days. It can also be frozen. Freeze it uncovered, then when it's firm, wrap airtight and freeze for up to 2 months. Defrost, still wrapped, overnight in the refrigerator.

Subscribe to:
Posts (Atom)


